

Installation Procedure for a SQL Server 2012 Instance:-
Physical setup specifications for Microsoft SQL Server (theoretical): Disk Partitions: C:\ drive of 40GB, E:\ drive for 30GB for SQL Server Data and Application Files (root used, not program files)
Prerequisites if asked for Dot Net Framework core role is enabled or Service Pack 1, click OK for the update. or we can install it from the server roles manually.Follow the below process to install it
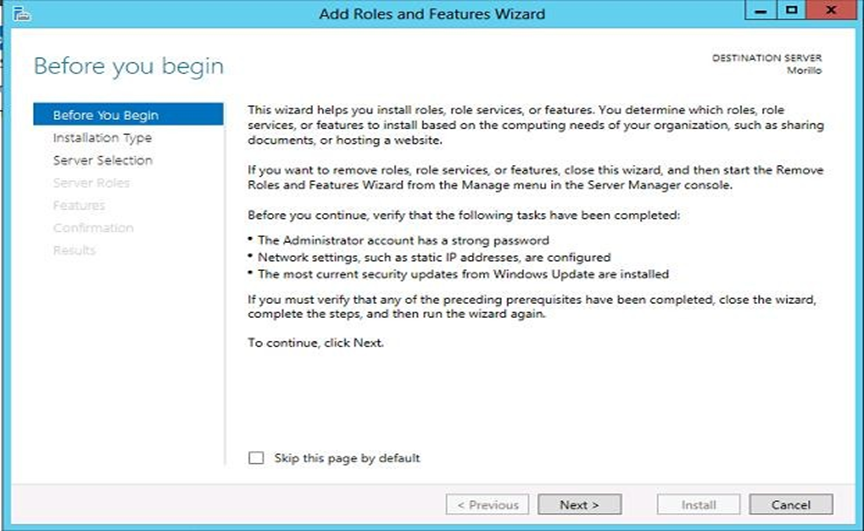
Step 1. On the Server Manager of Windows Server 8, we made a click on the Manage menu, and selected the option “Add Roles and Features”.
Physical setup specifications for Microsoft SQL Server (theoretical): Disk Partitions: C:\ drive of 40GB, E:\ drive for 30GB for SQL Server Data and Application Files (root used, not program files)
Prerequisites if asked for Dot Net Framework core role is enabled or Service Pack 1, click OK for the update. or we can install it from the server roles manually.Follow the below process to install it
Step 1. On the Server Manager of Windows Server 8, we made a click on the Manage menu, and selected the option “Add Roles and Features”.
Step 3. On the installation type page, we chose “Role-based or feature-based installation”.

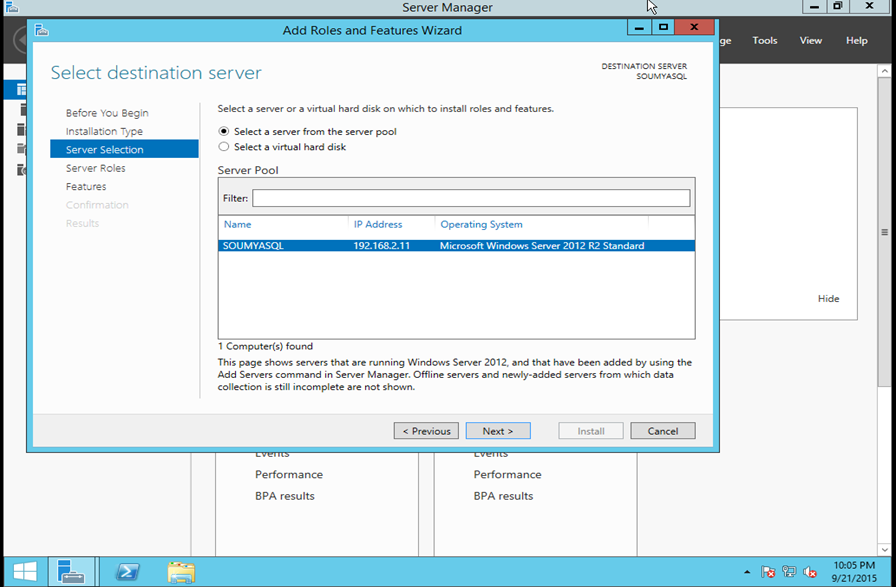
Step 4. On the Server Selection page of the wizard, we selected the actual server where we were installing SQL Server 2012.
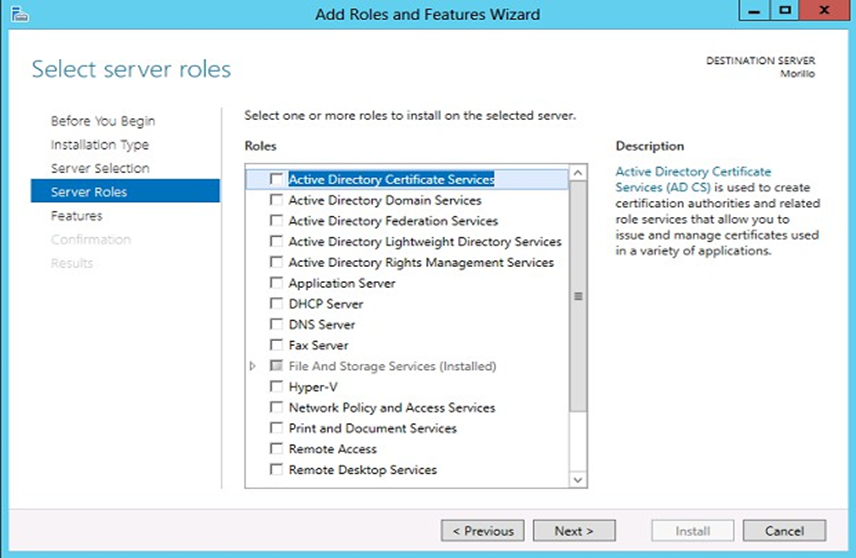
Step 5. On the “Server Roles” page of the wizard, we just clicked on the Next button
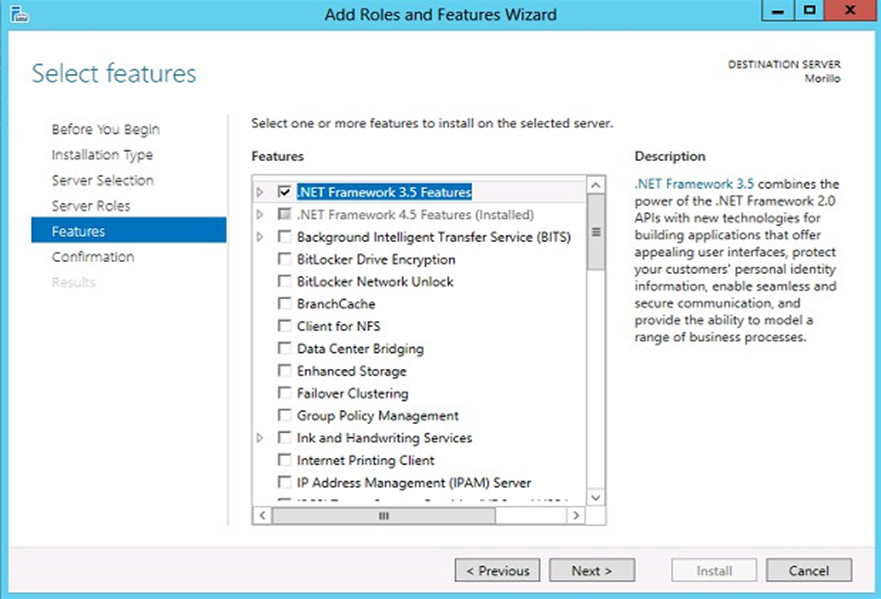
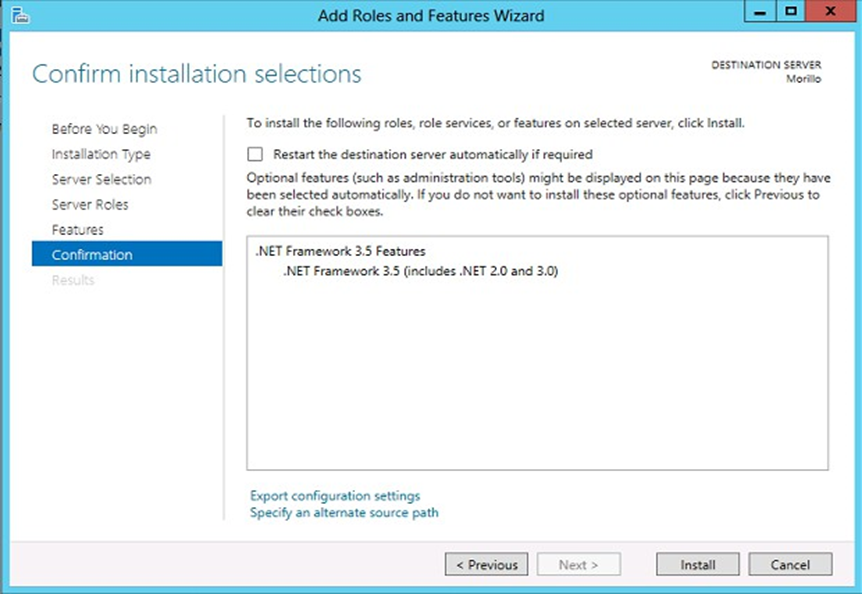
Step 6. On the “Features” page of the Wizard, we clicked on the checkbox next to “.NET Framework 3.5 Features”, and then clicked on the Next button.
On the confirmation page, we just clicked on the Install button.
Now once installation of .NET Framework 3.5 has been done restart the server once.
SQL server installation:-
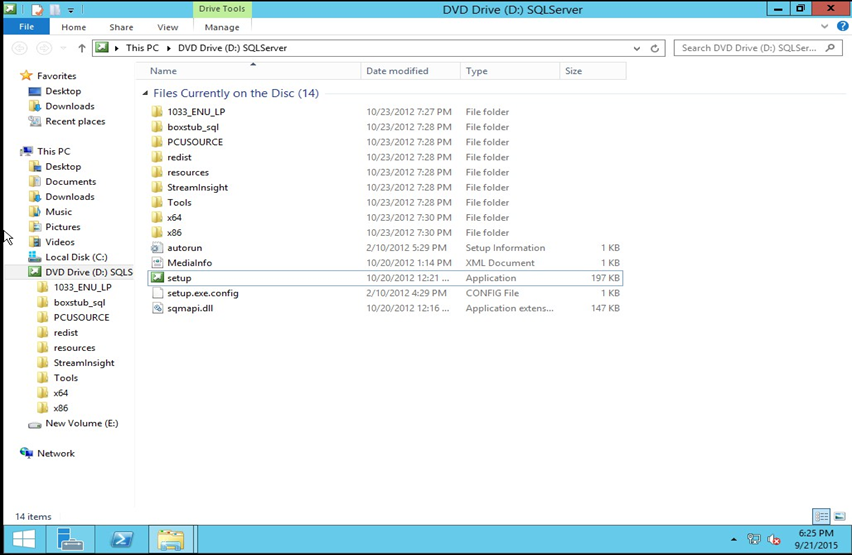
Step 1. Log on to machine, or with Remote Desktop, and load installation media. E.g. in Windows 12 all you have to do is right click on the required ISO and select Mount. Then click on Setup from the root.
Step 2. Click on Installation, then ‘New SQL Server stand-alone installation…’ (top)
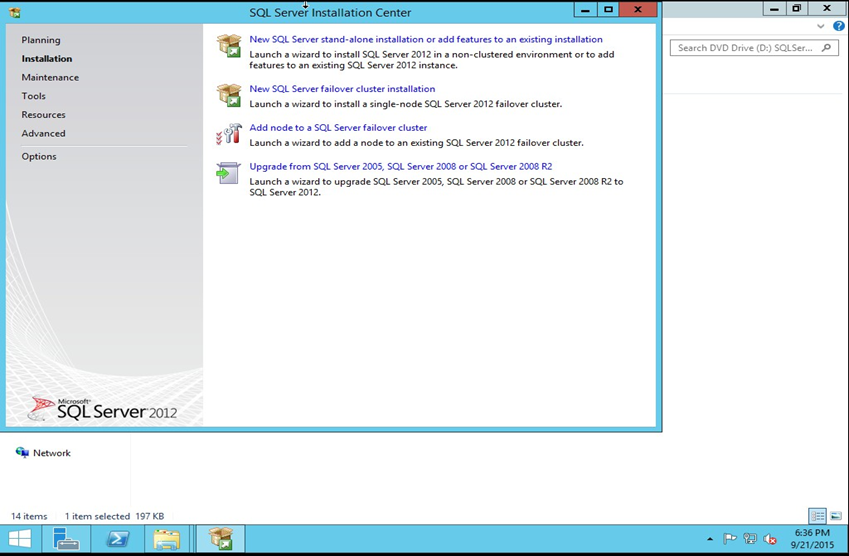
If you are adding features to an existing SQL Installation, click on the top link also. Step 3. Let the setup rules check run, then Next:
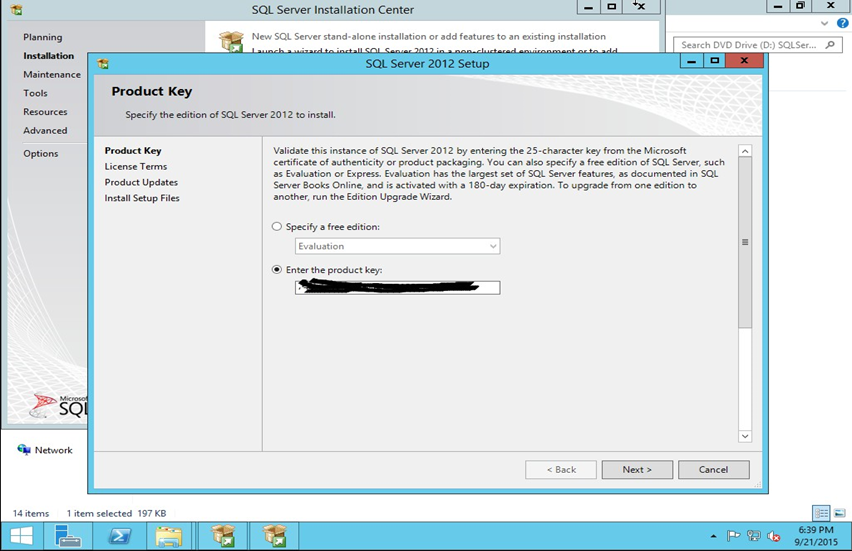
Step 4. Make sure there is key automatically taken from the ISO, enter your key, or chose Evaluation.
Step 5. Accept the License Terms and Conditions You may want to check Send feature usage data to Microsoft, if you want to facilitate the support with the vendor for the instance. (this is an print screen from SP, but the action is the same, check the box accept terms).
Click Next.
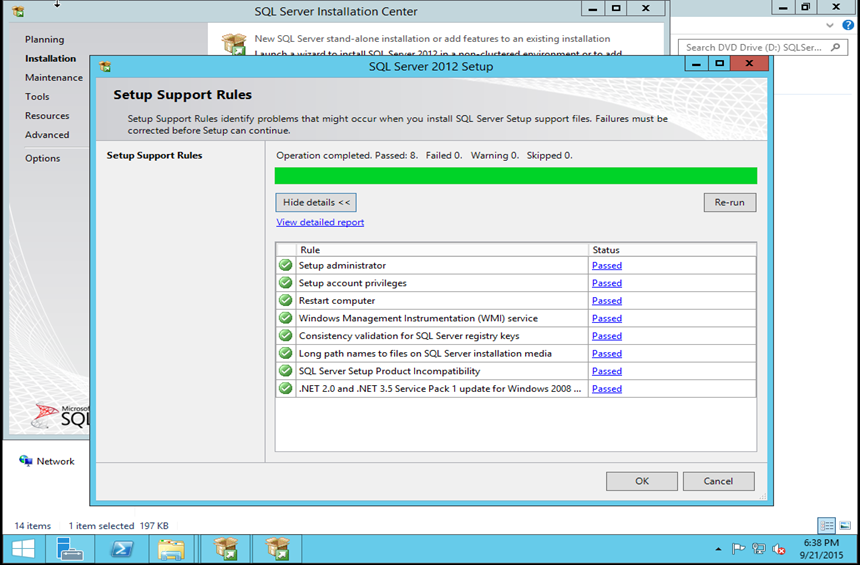
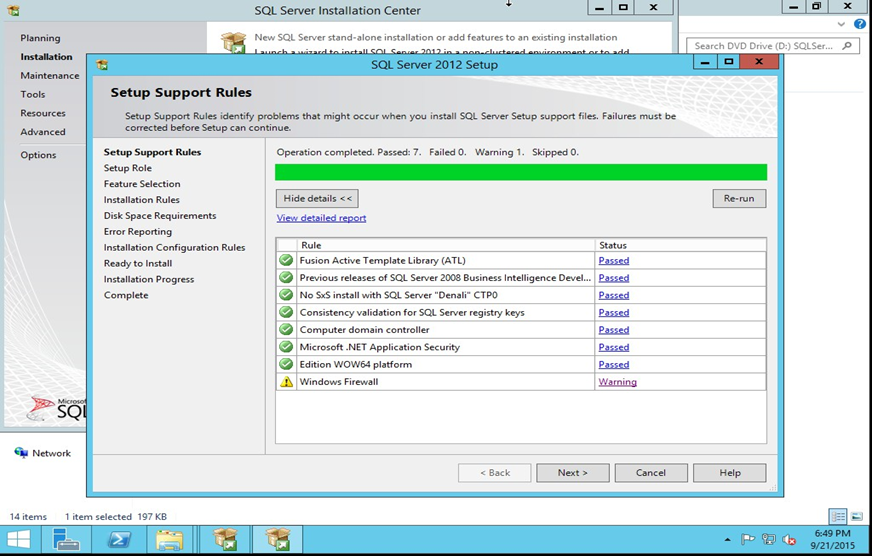
Step 6. Make sure the Pre-install Setup Support Rules provide a Passed Status for each rule or acceptable warning, and then click Next.
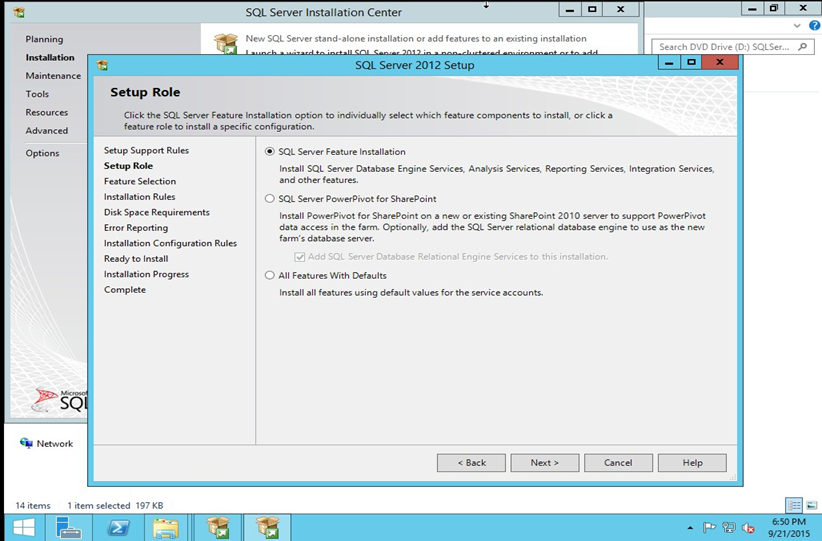
Step 7. DB Server Setup – Do not choose All Features With Defaults, unless you truly to want them ALL. Continue with Feature Installation for a precise Server install.
Step 8. This particular instance is for a Server, thus had requirements of DB Engine, Data Quality Services, Analysis Services, Reporting Services. A typical Workstation installation would only require Client Tools Connectivity, **Backwards Compatibility, and Management Tools .
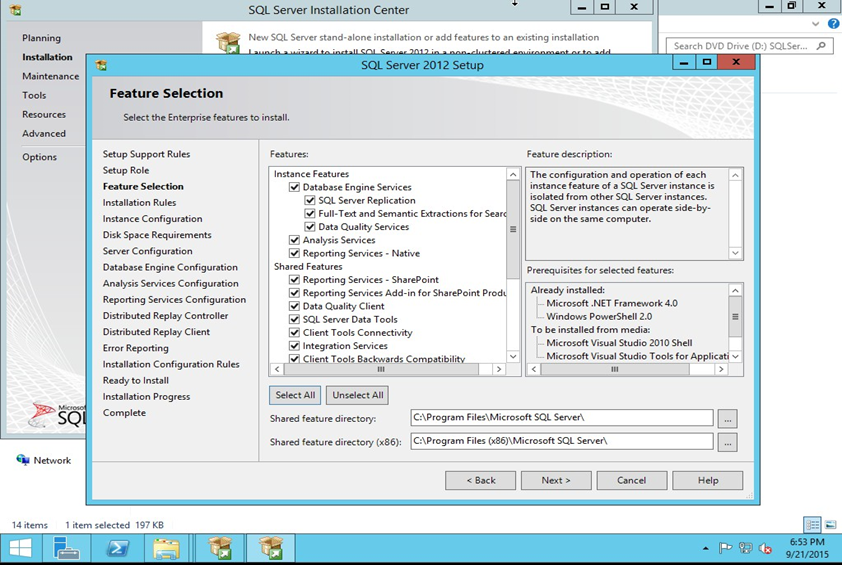
NB: For your specific instance, the above may not all be necessary, thus you have the option to do a minimal install and add features later on, or Install them all, but leave them disabled (to avoid adding features later).In the above example, I choose all .
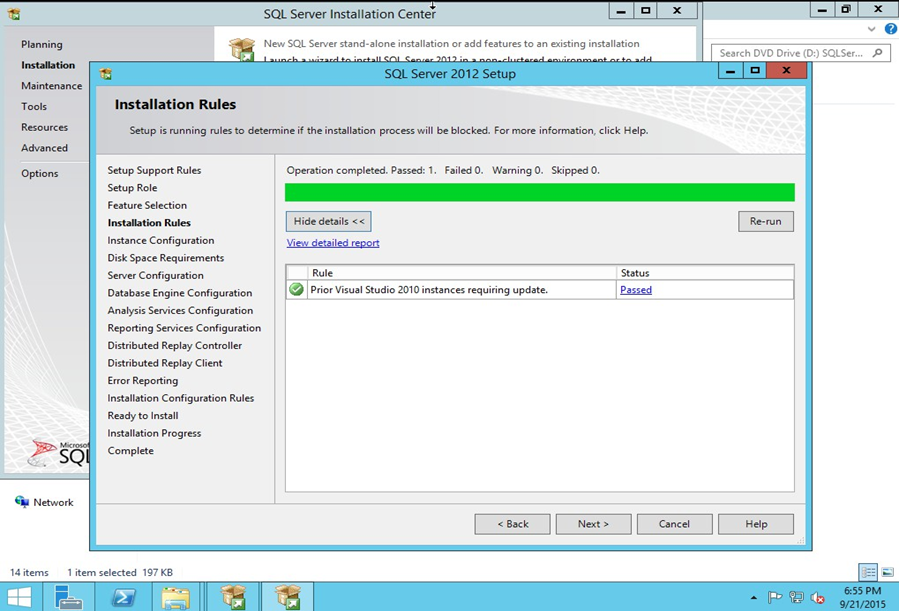
Step 9. A new installation step added since 2008 R2 is this Installation Rule Confirmation for Visual Studio:
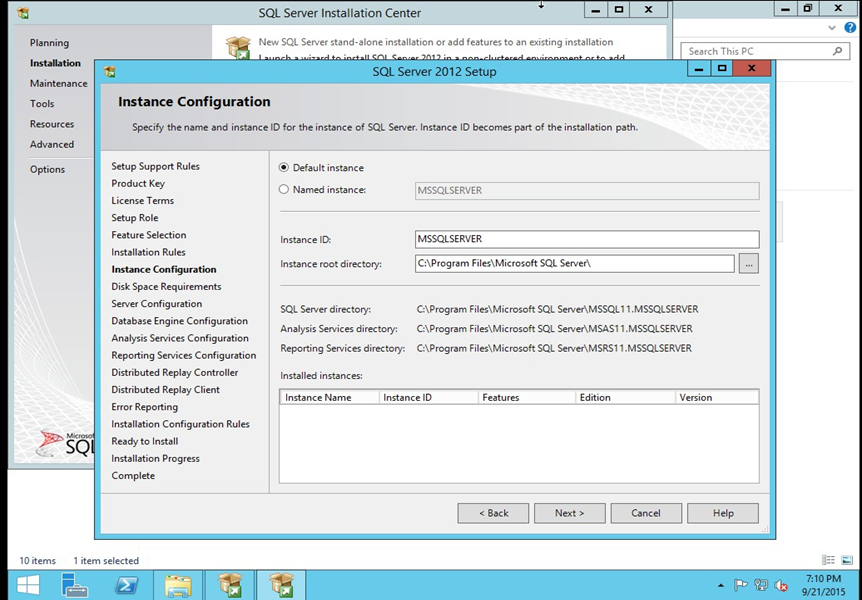
Step 10. Chose default instance configuration. The instance root for server should be your dedicated Data Drive (e.g. D:\) – On my workstation test server, this remained the same shared feature install (C:\). Click Next.
Here, Default instance means you connect to the machine name ,If you want a specific instance name , select named instance -thus the instance name will be Machinename\InstanceName.N.B: On a Server please make sure Instance root is on your dedicated Data Drive (most cases will be D, and not C) Some System Admins prefer to reserve even a disk partition for Applications, thus C for Windows OS, D for applications, as well as reserved drive letters for Data, Logs and TempDB (e.g. E, L, T). You can Click Back at any point to change and validate
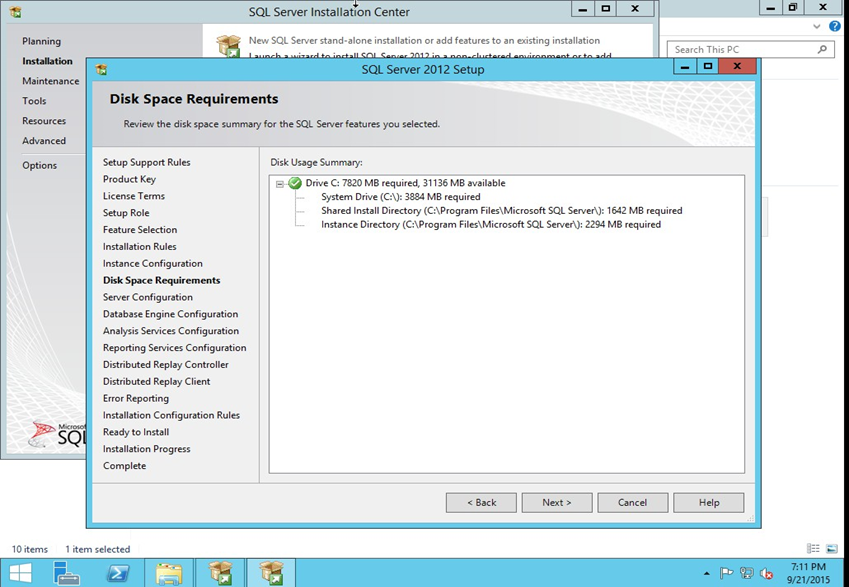
Step 11. Validate Disk Space Requirements and click next
Step 12. a) Server Configuration – Click on Use the Same account for all SQL Server services For a production SQL Server chose a domain account that is reserved for SQL Server (a Service Account specifically, which is preferred by auditors as well as Administrator.).
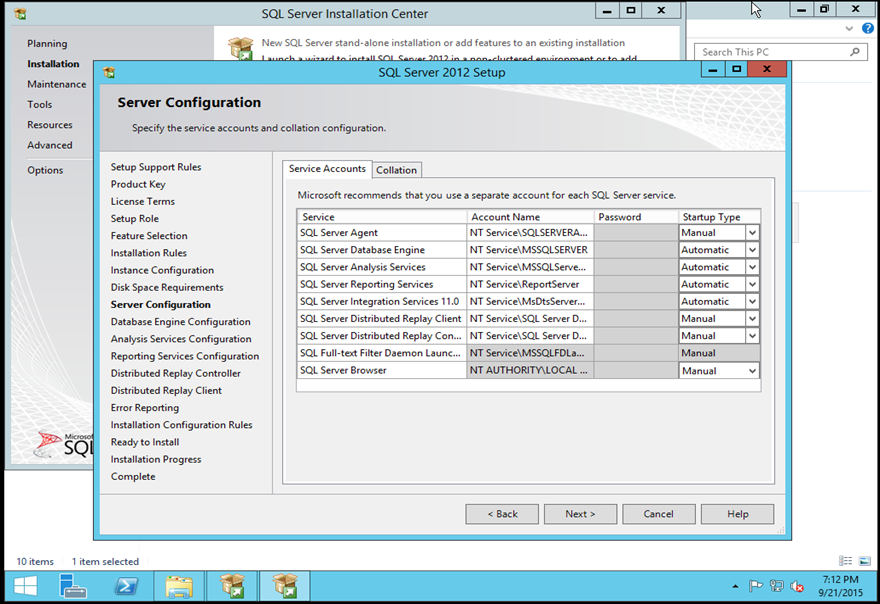
Add your reserved Active Director application account here – startup is auto for the Engine and Agent, leave the rest manual until needed (instead of disabled as above), if they are at all. Of course, if you need these serviced up constantly, set the startup type to Automatic.
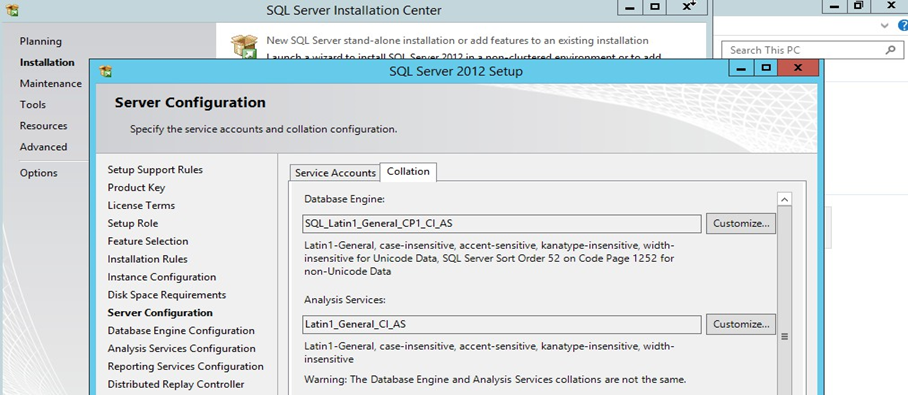
b) Leave the Collation tab as is, SQL_Latin1_General_CP1_CI_AS is the default and is the Latin Character set which accounts for Accent Sensitivity and Case Insensitivity.
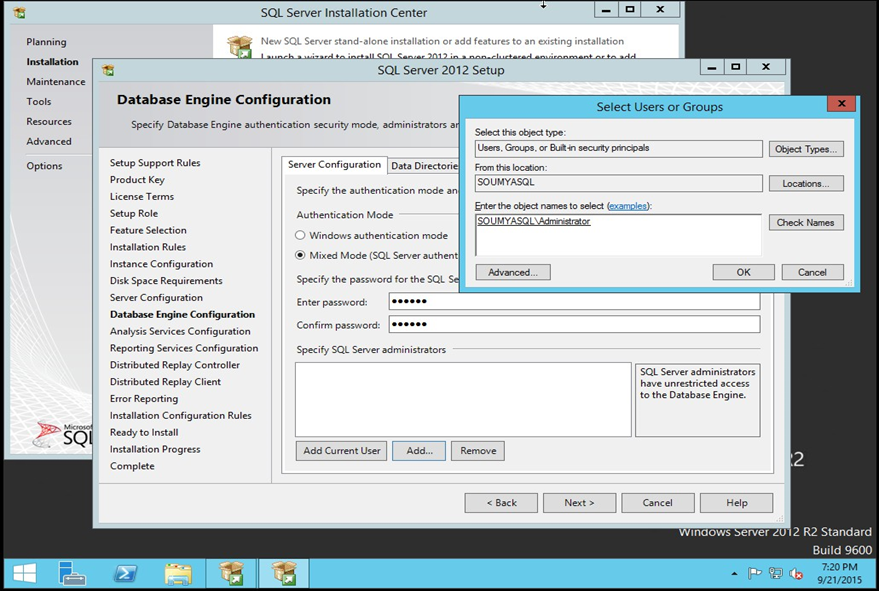
Step 13. a) Select Mixed and provide password for sa user , and Add the group which holds all the DBAs, or in this case, my local machine account with Administrative rights.
b) In the Data Directories input fields and place your files across drives, using the example below as a way to distribute your Database related files.

Dedicated E drive for SQL Server for the Data files , Logs etc. Step 14. Add current user and other Admins or Admin groups.

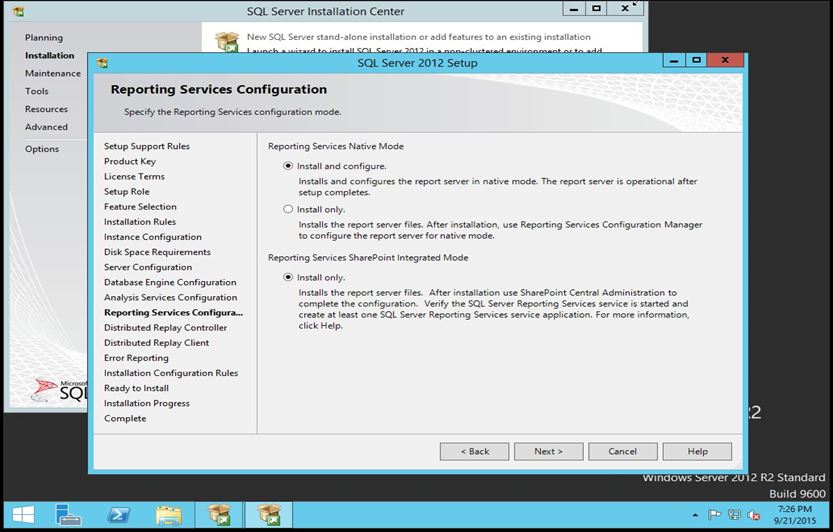
Step 15. For Reporting Services, use Native Mode, since we are not using SharePoint (or leave Install only, and configure RS at a later date.)
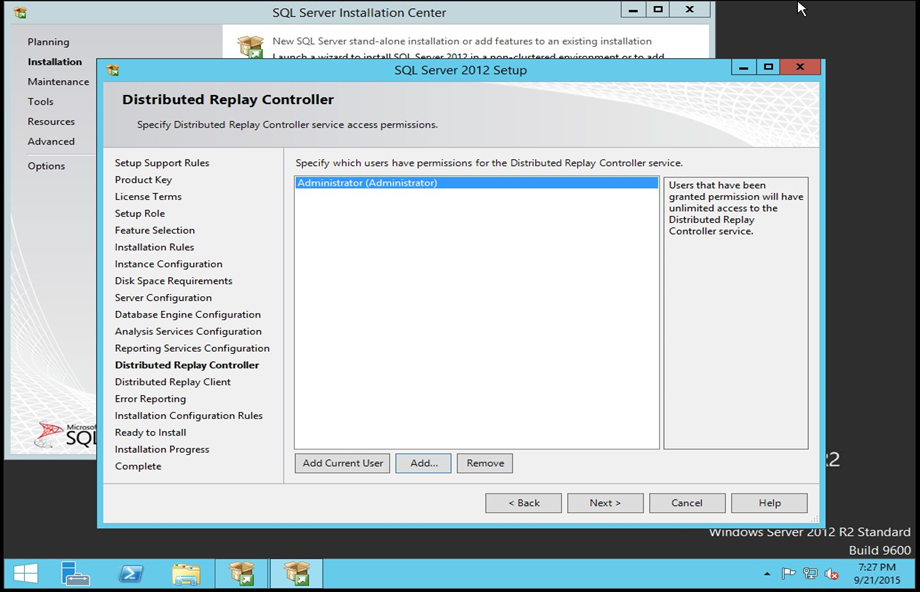
Step 16. Distributed Replay Controller (if you selected the option).
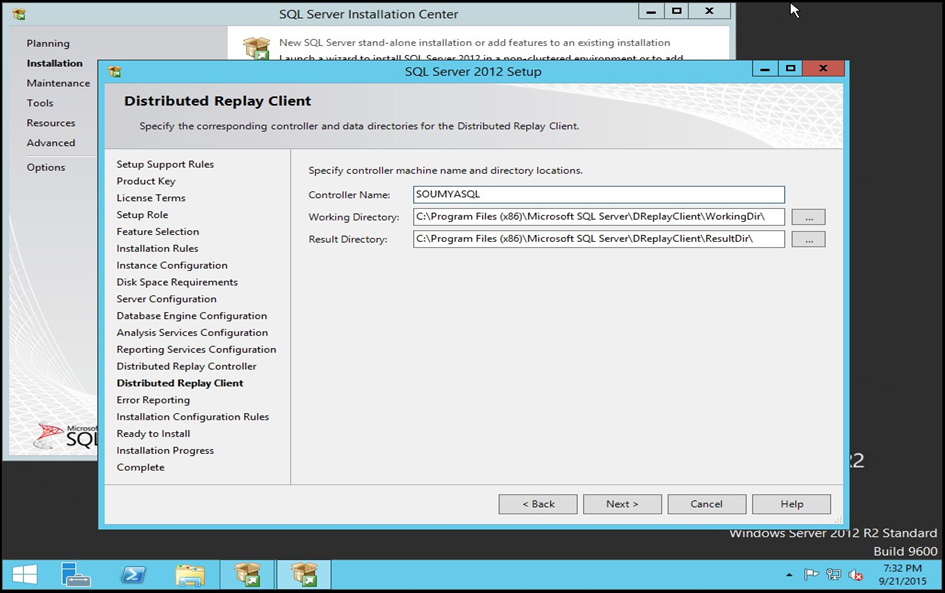
Step 17. Provide information for Distributed replay client.
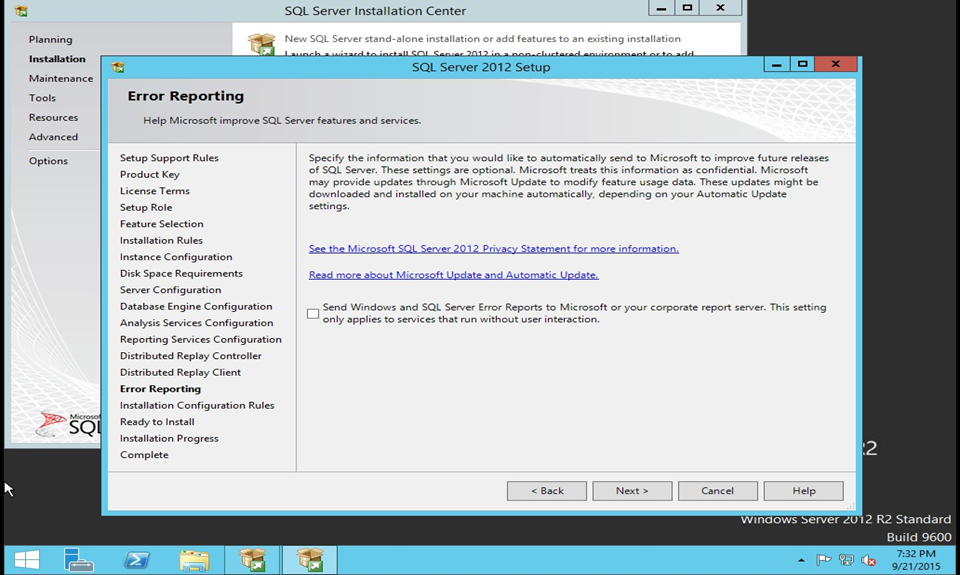
Step 18. If you want to send information to Microsoft select the below option else leave it.
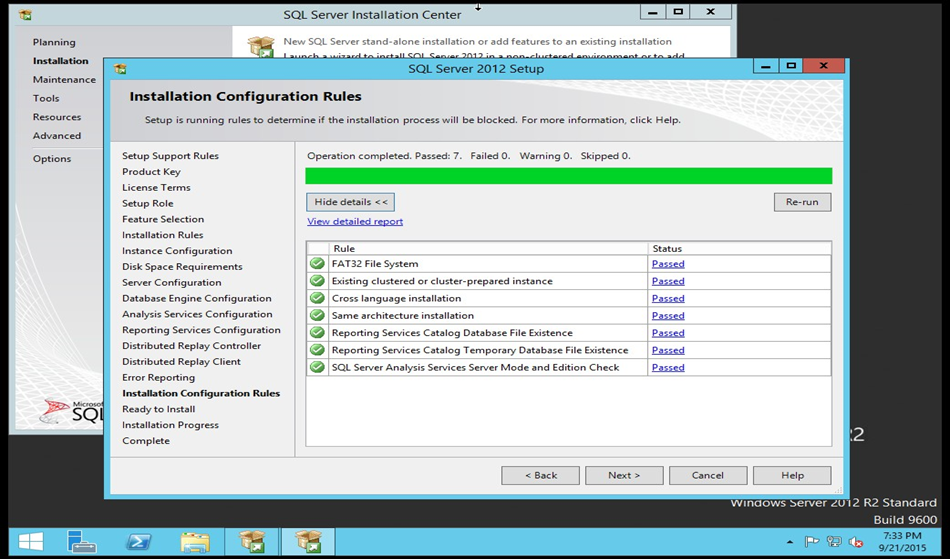
Step 19. Now that all the ‘Installation configuration rules’ are taken care of, the installation proceeds by clicking Next.
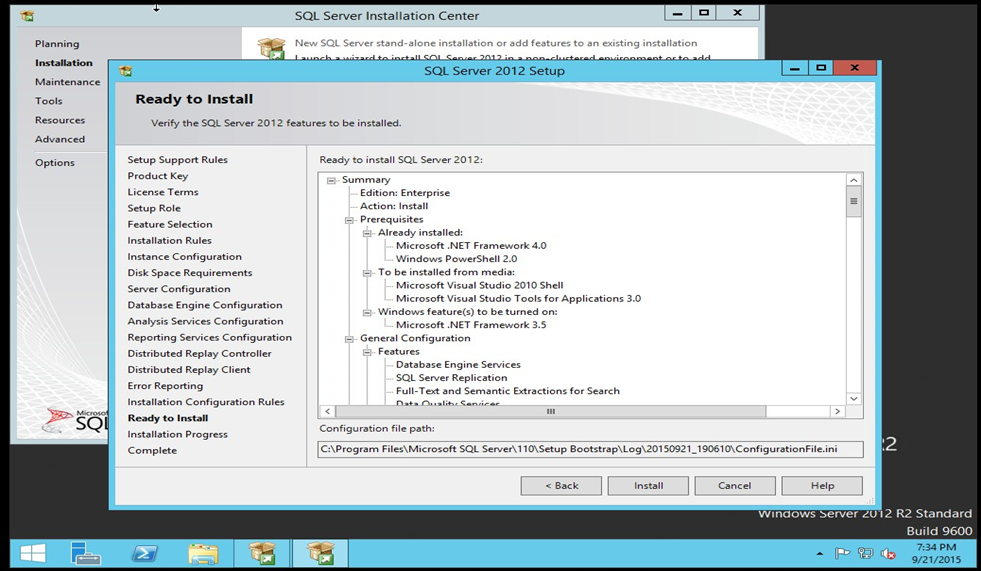
Step 20. The following is to validate the installation (Click Next):
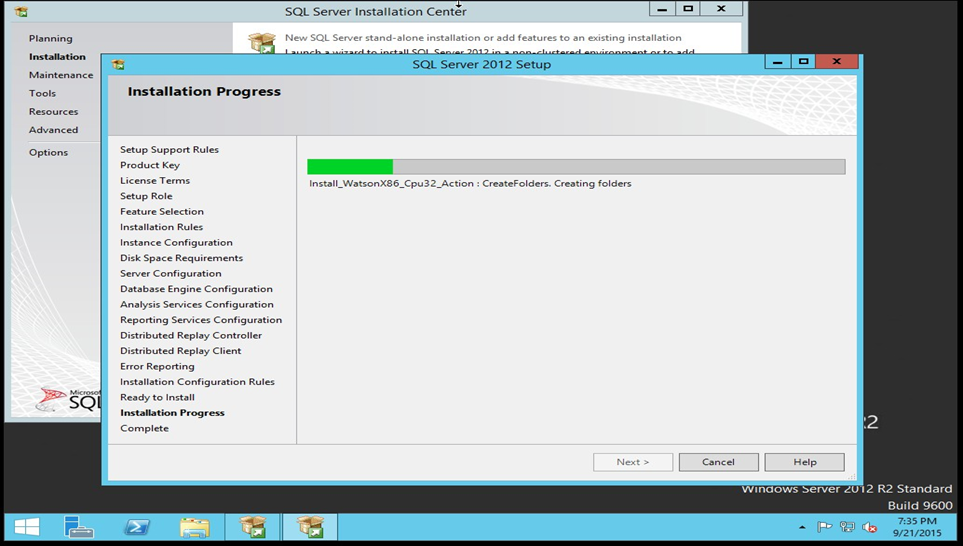
Step 21. The installation will take a while (30-35 minutes depending on the resources of the machine).Be patient, this may take a long time .
Step 22. ) Next, and then Close next page upon confirmation of successful install.
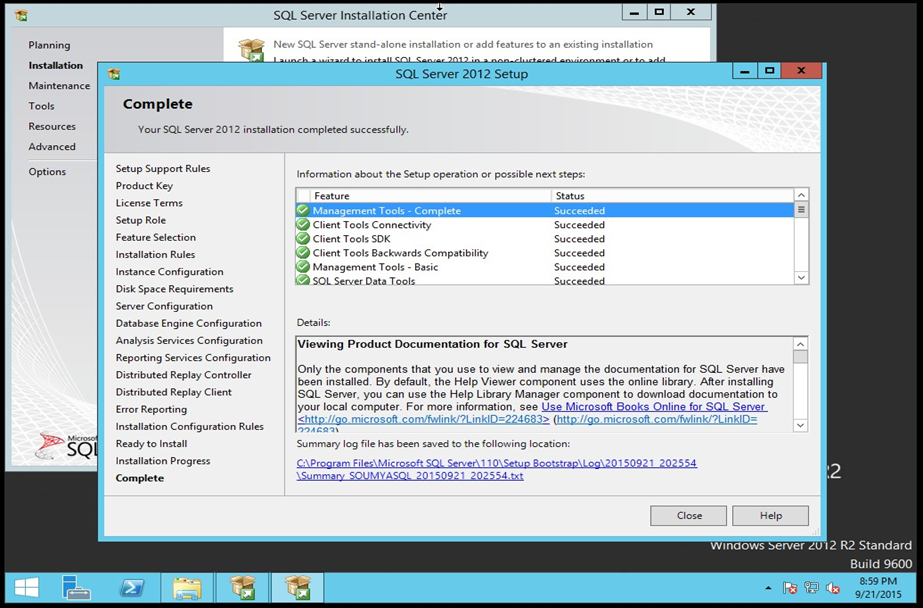
Now once installation is completed restart the server once and we are ready to use.
Leave a Reply