

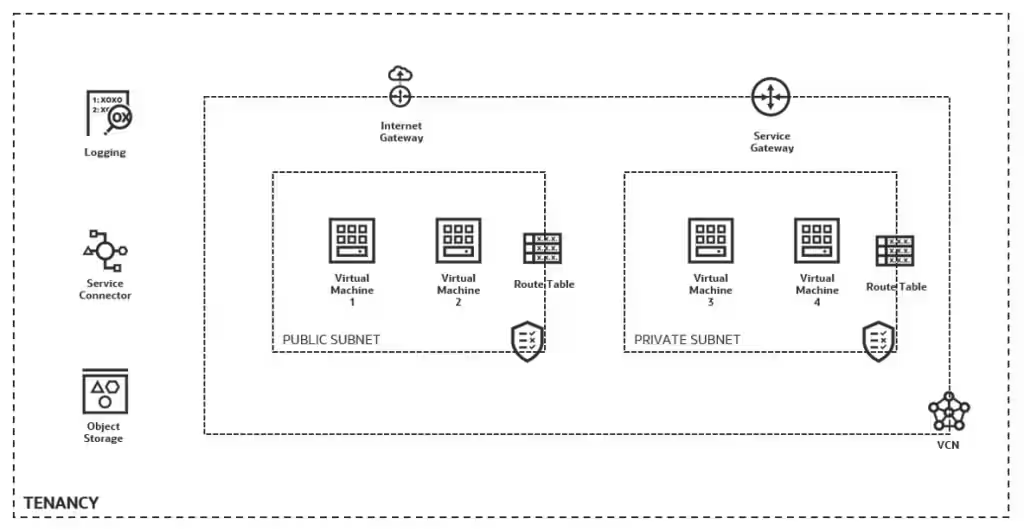
Every application that runs in a server environment generates logs automatically. These logs provide important information about how a system is operating and how it operated in the past. By searching through log data, you can pinpoint issues and act before something goes wrong. However, looking at hundreds or thousands of different logs across different servers is extremely time-consuming.
Oracle Cloud Infrastructure (OCI) Logging service is a highly scalable and fully managed service that allows you to access logs from OCI resources. OCI Logging allows three kinds of logs: Audit, service, and custom logs.
In this blog, I show how you can easily enable custom log consolidation for a list of servers. I also show how you can archive your logs to OCI Object Storage using a service connector.
Configure custom logging for Compute instances
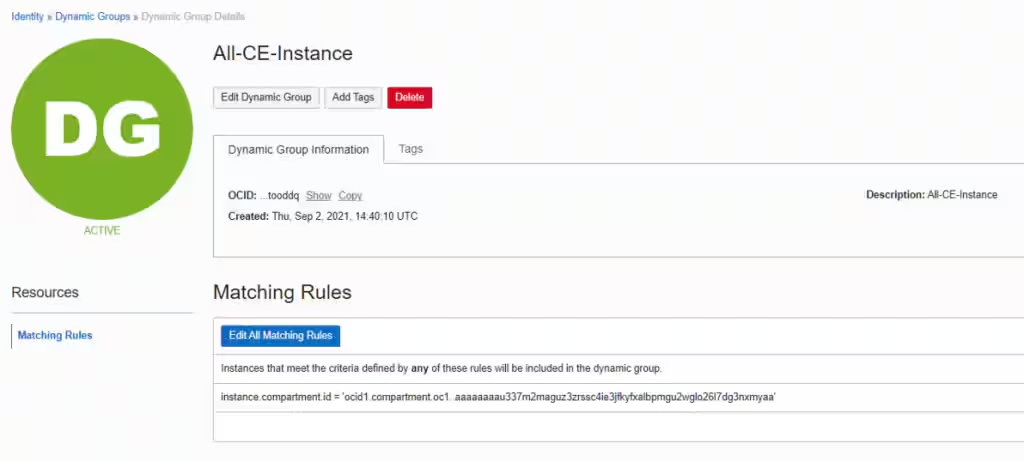
1. Create a dynamic group to include Compute instances in OCI Logging. Use the following command to include the rules:

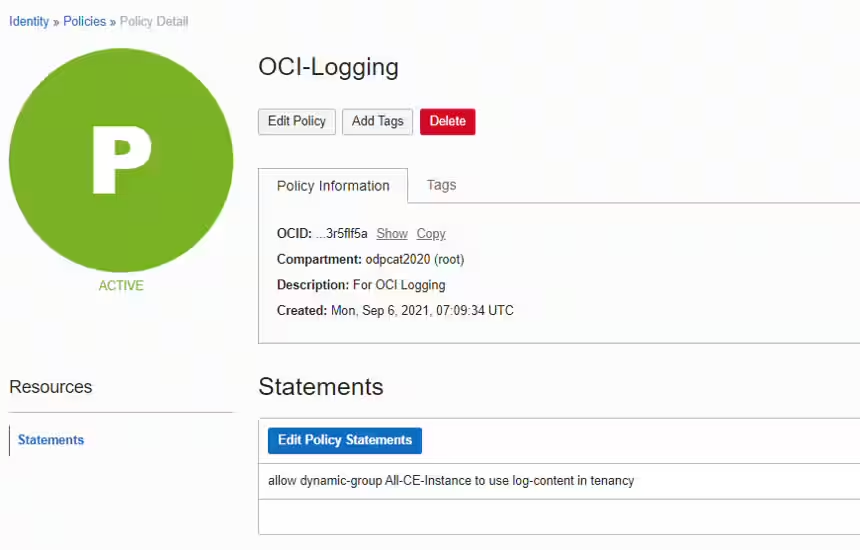
2. Create policies to allow the dynamic group to interact with OCI Logging using the following policies syntax:

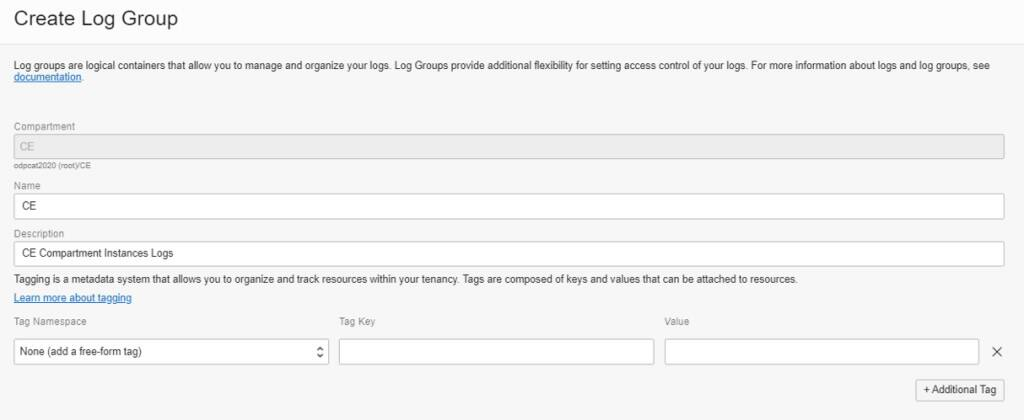
3. Create the log group. A log group is a logical container for organizing logs. Each log group can have more than one log in it.
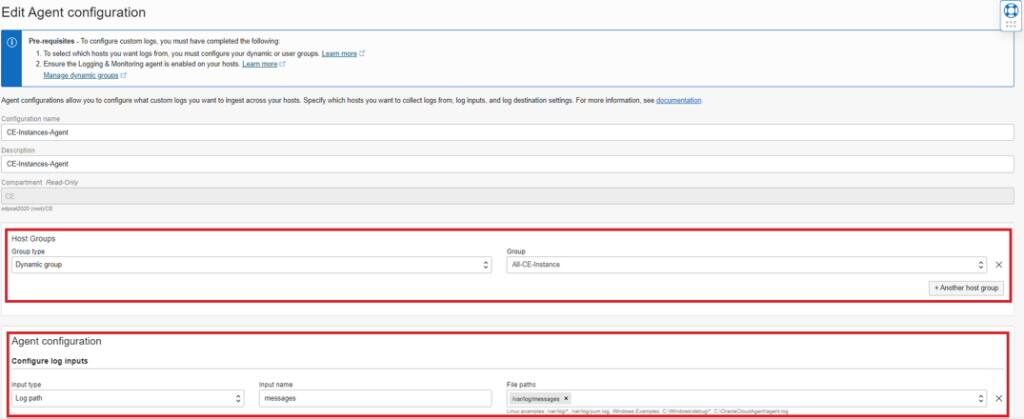
4. Create the agent configuration. Agent configuration is a centralized endpoint for all your instances’ agents to connect to. In each agent configuration, you define a set of dynamic groups that can connect and a set of custom logs from your instance for OCI Logging to ingest.
5. Enable or install the agent in each of the instances. You can enable agents with supported Oracle images. The documentation also has step-by-step guide on how to install the agent.
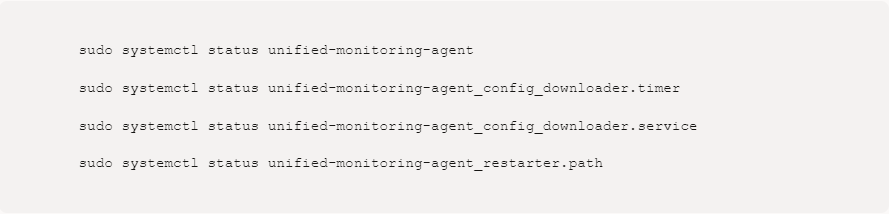
After enabling or installing the agent, ensure that the necessary services are active with the following commands:
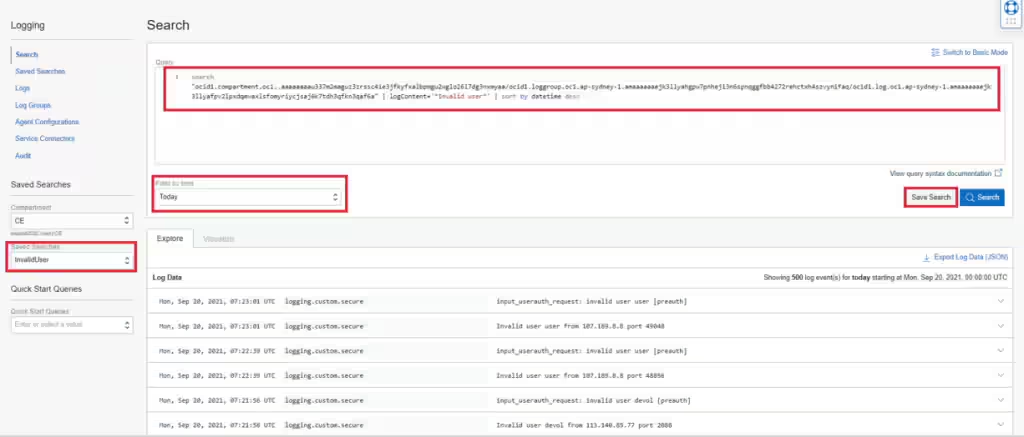
6. Verify that you can search for the logs in OCI Logging. When you’re on an advanced mode of log searching, you can define the query. Define the time in the filter condition and save the search so that you can easily find it in the future by selecting the Saved Search menu.
Configure a service connector to archive logs in OCI Logging
When you create logs in OCI Logging, you can specify the log retention 1–6 months. If you want to store logs beyond that period, you can use a service connector to archive the logs in a, OCI Object Storage bucket. With the logs collected from OCI Logging, you can define a service connector to push the logs to Object Storage and further define archiving policies in Object Storage.
1. Create a service connector and define the source (logs) and target (Object Storage).
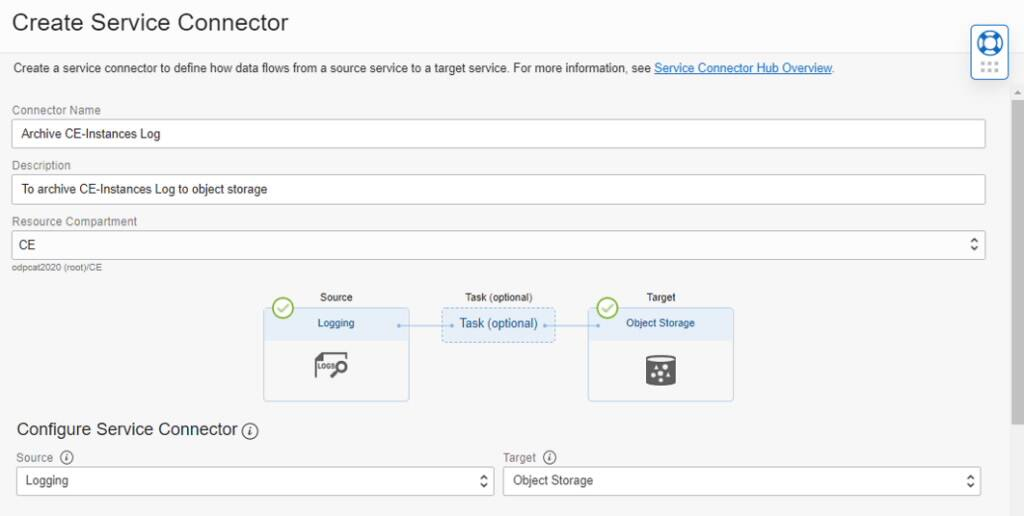
2. Choose the logs and apply a log filter task to further filter the logs that you want. Then, you can either choose a task from OCI Functions to process the logs or leave it blank. Finally, choose the target bucket where you want to store logs.


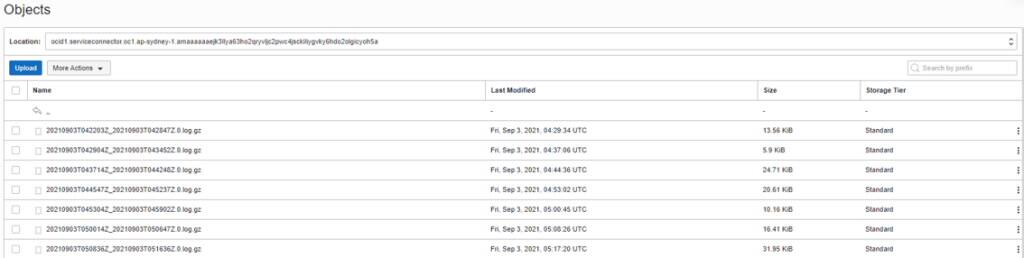
3. Finally, check your Object Storage buckets to find the list of gzip logs.
Summary
OCI Logging provides a centralized log management solution that allows you to consolidate all your server’s log into a secured centralized location, simplifying log analysis and correlation tasks. You can easily search through different kind of logs in a single place and even archive old logs into OCI archive storage for compliances and cost savings.
Leave a Reply