

Recently I came across a requirement from a customer where they wanted to enable audit trail on EBS Application. Today I will show how to enable it.
Step 1.
As an example, I will be enabling auditing on table AP_CHECKS_ALL
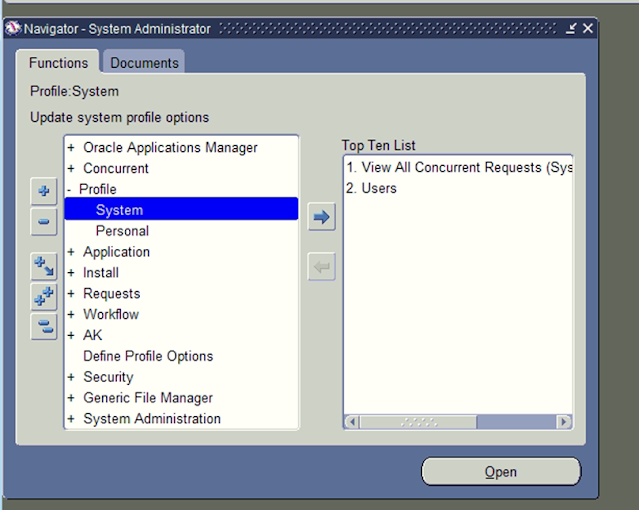
Navigate to Responsibility: System Administrator
Navigation: Profile > System
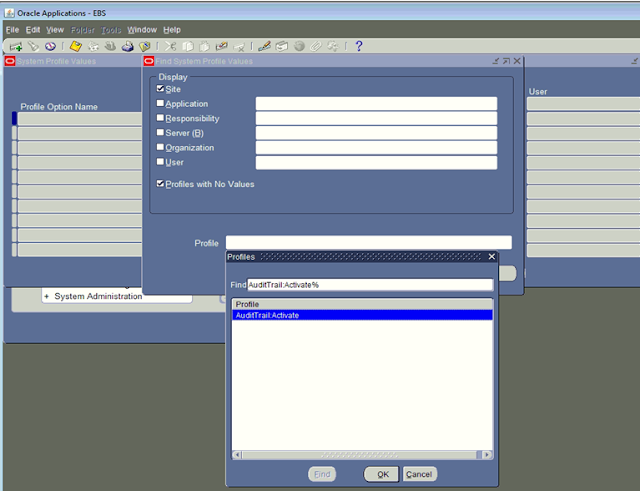
Query Profile: ‘AuditTrail:Activate’. Click FIND
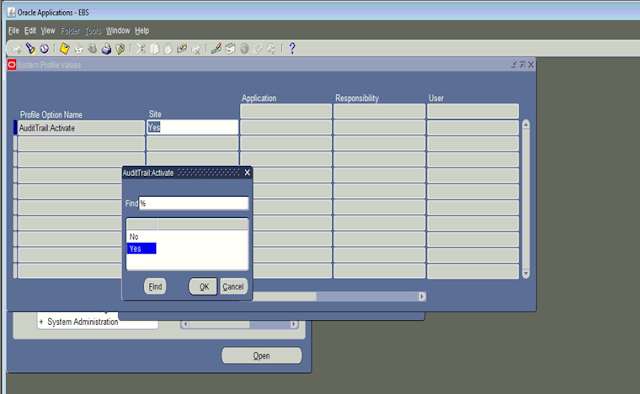
Set it to ‘Yes’ at Site level.
Step 2.
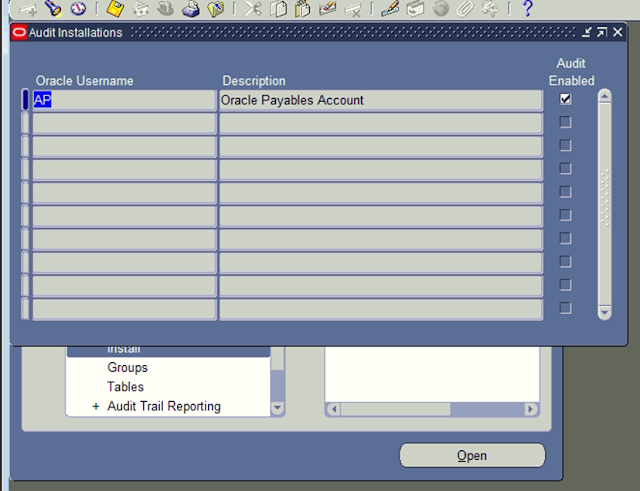
We will be enabling Audit Installations for username. In this case it will be AP.
Navigate: System Admin > Security > Audit Trail >Install
Enable Audit Installation for AP

Note:-
It is important to keep “Audit Enabled” for a certain schema which has been enabled by default.
By default auditing is enabled for the following schemas. If any of the following schema is not enabled, it is advised to enable them.
| APPLSYS GL FA AP AR INV PO CE GMA GMD GME GMF GMI GML GMP WSH FV APPLSYSPUB ZX |
Step 3.
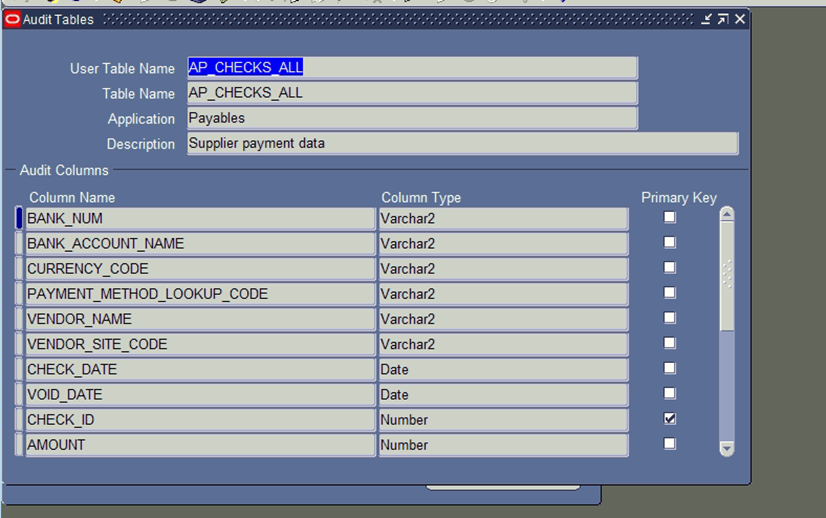
Define Audit tables and desired columns.
Before enabling the auditing on columns, please check the limitations.
| The following are limitations. A. Maximum columns 99 for a given table. Best practices are 50 columns or less due to the amount of data that audit trail generates. B. No LONG, RAW, or LONG RAW columns C. Your audit group must include all columns that make up the primary key for a table; these columns are added to your audit group automatically. D. Once you have added a column to an audit group, you cannot remove it. E. Audit Trail requires two database connections. If your operating platform does not automatically support two database connections (e.g., VMS or MPE/XL), then add the environment variable ‘FDATDB=’ to your environment file. F. Because the structure of the audited table may change between product versions, Audit Trail does NOT support upgrading existing shadow tables or audited data. Before an upgrade, you should archive the shadow tables and perform all necessary reporting on the audited data. |
Navigation: System Admin > Security > Audit Trail > Tables
Query for user table name ‘AP_CHECKS_ALL’ and add columns on which you want to enable trail do the same for table AP_CHECKS_ALL
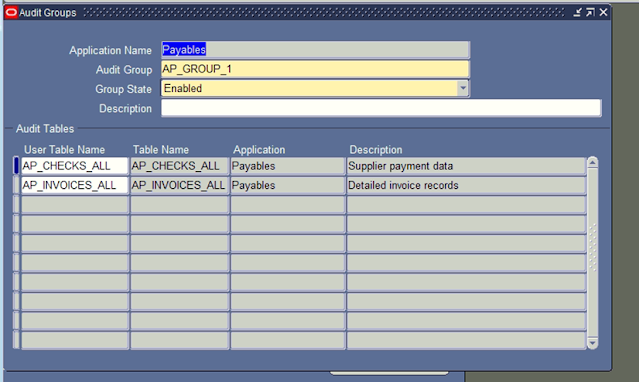
Step 4:- Define an Audit Group and associated tables
Navigation: System Admin > Security > Audit Trail >Groups
Create Audit group for table defined in step 3.
Here we created an audit group AP_GROUP_1 and added table name AP_CHECKS_ALL and Save. Once added , the group state becomes enabled.
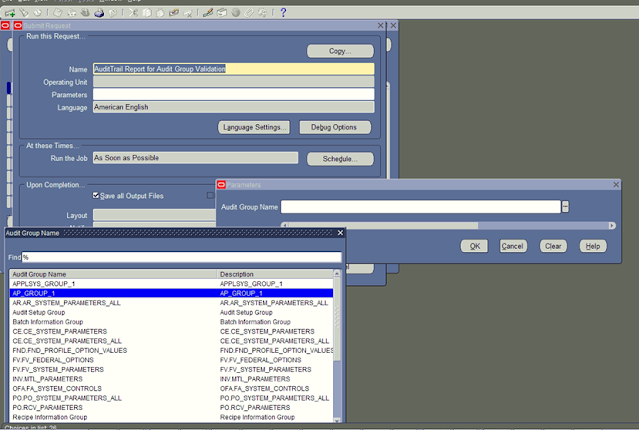
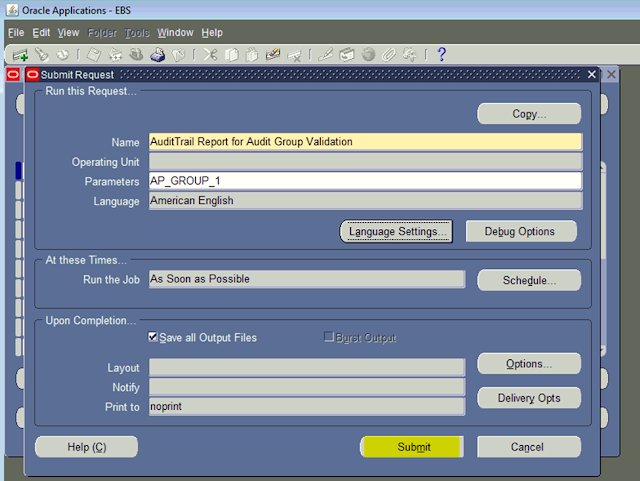
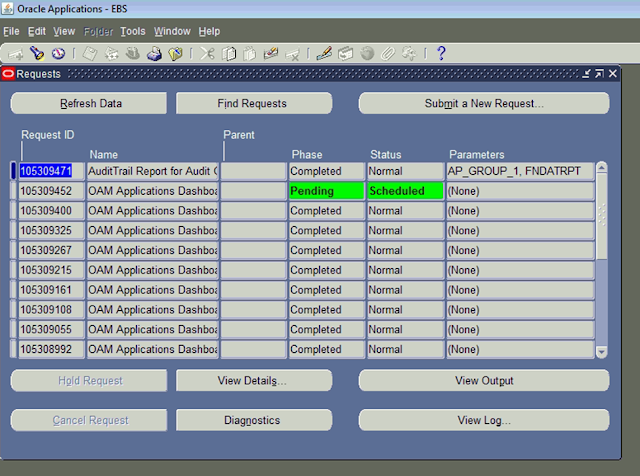
Step 4:- Run Concurrent program ‘AuditTrail Report for Audit Group Validation’ with parameter as your Audit Group
Step 5.
Run concurrent program “AuditTrail Update Tables”.


If the above requests complete with normal status , we can verify the audit records from backend.
Select * from ap_checks_all_A

Leave a Reply